holiday
Road To Emmaus
This craft will serve as a reminder of when Jesus appeared to these two disciples; proving that He truly resurrected from the dead.

Instructions
- Print the template on card stock. (Template)
- Color and cut out both pieces.
- Glue the three figures onto a large popsicle stick.
- Cut on the solid line on the larger piece creating a slit.
He Is Risen
This craft might be simple, but it will help you illustrate the story of Easter.

Christ Is Buried
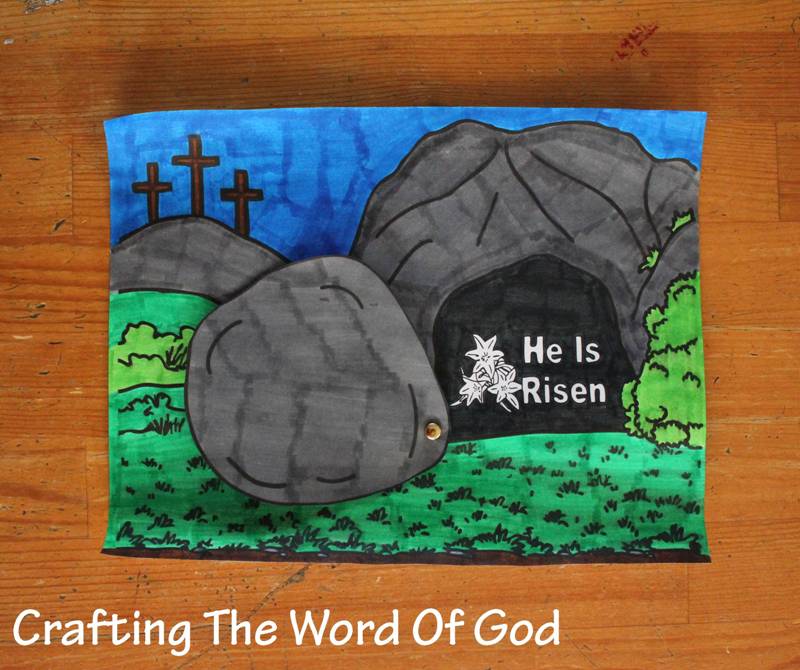
The Tomb Is Empty
Instructions
- Print the template. (Template)
- Color the main image and the boulder.
- Cut out the bolder.
- Place the bolder over the opening of the tomb and then puncture a paper fastener/metal brad to hold the bolder in place.
He Is Risen- Coloring Page
 He Is Risen
(Coloring Page)
Coloring pages are a great way to end a Sunday School lesson. They can serve as a great take home activity. Or sometimes you just need to fill in those last five minutes before the end of class.
Preview and print this free printable coloring page by clicking on the link below.
Feel free to browse all of our Bible print-outs.
Road To Emmaus- Coloring Page
 Road To Emmaus
(Coloring Page)
Coloring pages are a great way to end a Sunday School lesson. They can serve as a great take home activity. Or sometimes you just need to fill in those last five minutes before the end of class.
Preview and print this free printable coloring page by clicking on the link below.
Feel free to browse all of our Bible print-outs.
I Love You To Pieces
If you’re looking for a fun and easy craft to make for Valentines Day I’ve got just the thing for you.

Instructions
- Print the template. (Template)
- Color in the template.
- Glue pieces of red, pink and purple construction paper onto the heart.
I Love You Beary Much
This adorable craft is very easy to make. Your kids will get a huge kick out of making it and it will bring a smile to anyone who gets one.

Instructions
- Print the template. (Template)
- Color and cut out all of the pieces.
- Glue the bear head onto the body piece.
- Next glue on the heart.
- Glue on the legs and finally the hands.
I Love- Activity Sheet
 I Love
(Activity Sheet)
Activity sheets are a great way to end a Sunday School lesson. They can serve as a great take home activity. Or sometimes you just need to fill in those last five minutes before the end of class.
Preview and print this free printable activity sheet by clicking on the link below.
Feel free to browse all of our Bible print-outs.
Dipped Pine Cone Ornaments
Today’s post comes from a guest blogger, Mary-Kate Warner from Christianity Cove, sharing how a simple pine cone can teach our kids a great message this Christmas season.
The pine cone is the only Christmas ornament that can be found on the forest floor. It is simple, free and beautiful, just like our salvation. But it is also complex like God’s wonderful universe. While making pine cone ornaments, kids can come to better understand our relationship with the Almighty.
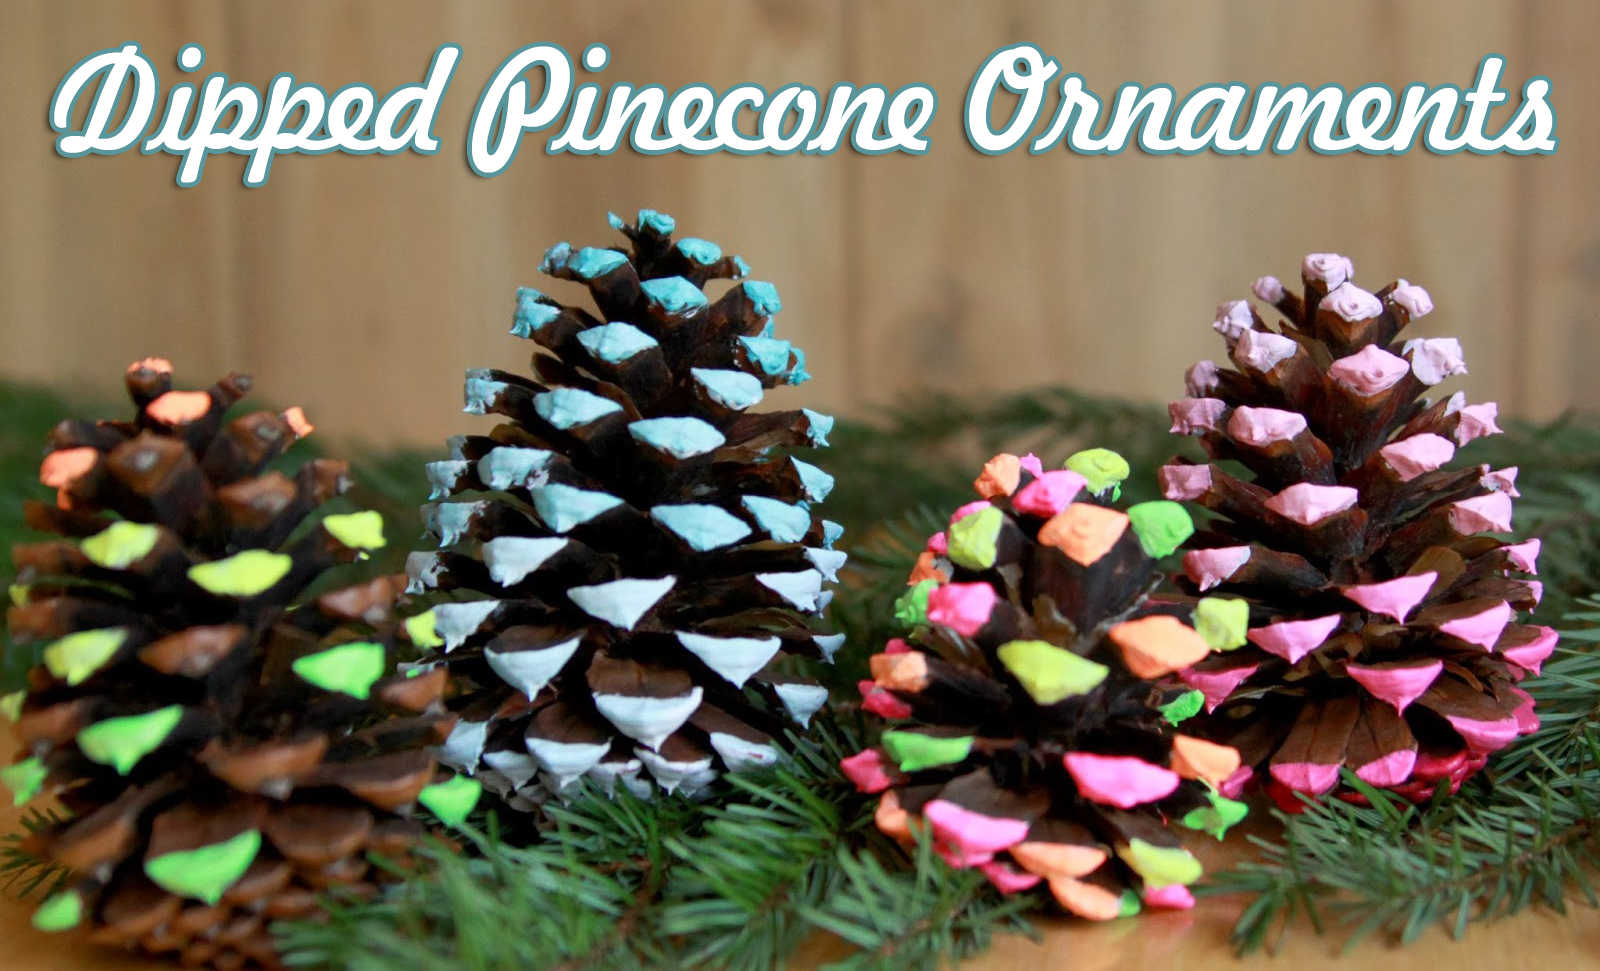
Materials
- Pine Cones, Different Sizes
- Acrylic Paint, Variety Of Colors
- Paint Brushes, One For Each Child
- Wax paper
- Glue
- Glitter
- Red Or Green Ribbon, Thin
Instructions
1. Paint the pine cone in whatever paint combination you choose. You can either just paint the tips or paint by immersion—whichever works best for you. (Immersion is messier!)
2. Place the pine cone, wide side down, onto wax paper.
3. Allow it to completely dry.
4. Brush the dry, painted tips with smaller bits of white, if desired. Or you can brush tips with glue and sprinkle with glitter to add some extra sparkle.
5. Thread a piece of red or green ribbon through the pine cone on the bottom of the base. Tie a knot and leave enough length of ribbon so it can be tied to a tree branch or bow of a Christmas package.
Discussion
Pine cones make great Christmas decorations. They’re beautiful, aren’t they? And we can find them on the forest floor…they’re like free gifts from God! How is a pine cone like our salvation? Our salvation is also a free gift from God that is very beautiful.
Do you know what a pine cone actually is? It is a seed pod. It carries the seeds of the pine tree to make other pine trees. It’s amazing! The pine cone just tumbles around…being its beautiful self…and other pine trees are born because of it. If we are Christians, what can happen if we act like a pine cone? We can share God’s love and make others aware that God loves them.
When we place our pine cones on our Christmas trees, or gift wrap presents using our pine cone, let’s remember that people can see God’s love and reap God’s great reward of salvation by watching us!
“Let your light shine before men in such a way that they may see your good works, and glorify your Father who is in heaven.” Matthew 5:16
Mary-Kate is a regular blogger at Christianity Cove. You can often find her writing about Christian Motherhood, Homeschool Teaching, Bible Study and Sunday School Activities, Faith and inspiring children to love God.
Candy Cane Jesus
The Legend Of The Candy Cane…
Look at a candy cane and what do you see? Stripes that are red like the blood shed for me. White for my Savior, who is sinless and pure. “J” is for Jesus, my Lord, that’s for sure! Turn it around and a staff you will see- Jesus, my shepherd is coming for me!
Many times during this Christmas season we get caught up in material things. Presents, decorations and food. It’s important to take the time to remember that those things have trully nothing to do with Christmas. The true meaning of Christmas is Christ. And that is exactly what this craft will do.
“She will bear a Son; and you shall call His name Jesus, for He will save His people from their sins.” Matthew 1:21

Instructions
- Print the template. (Template)
- Color and cut out all of the pieces.
- Glue the baby onto a sheet of yellow construction paper.
- Cut out the baby from the construction paper, leaving a border of yellow construction paper.
- Cut slits along the border of the construction paper at different intervals and angels.
- At this point if you like, you can decorate the candy cane with glitter. Allow the enough time for the glitter to dry.
- Finally glue the baby onto the candy cane.
Christmas Dove
This is one of my favorite Christmas crafts to make. It looks great hanging from a window or a doorway. You can even place it on your Christmas tree.

Instructions
- Print the template. (Template)
- Cut out the body and wings.
- Color and cut out the holly and berries.
- Trace the body and wings onto a paper plate.
- Cut out all of the pieces.
- Glue and then cut out the holly and berries from a piece of construction paper.
- Glue one wing to the front of the body and glue the other one to the back.
- Finally glue the holly and berries to the body of the dove.
If you don’t have paper plates you can print the template onto card stock.
You can also print this smaller version and make this craft into ornaments for your Christmas tree. (Template)
- ← Previous
- 1
- …
- 10
- 11
- 12
- Next →

You must be logged in to post a comment.