John The Baptist
Toilet Paper Roll Grasshopper

Kids will love making this grasshopper craft. This craft is very versatile and can be used for different Bible stories. It can be used for teaching the story of:
- The twelve spies.
- The ten plagues of Egypt.
- John the Baptist.
Instructions
- Print the template onto a sheet of cardstock. (Template)
- Color and cut out all of the pieces.
- Cover a toilet paper roll with green construction paper.
- Glue the legs onto another sheet of cardstock or even a piece of cardboard. You will need the strength so the legs can support the body.
- Cut out the legs once again.
- Glue the wings to the top of the toilet paper roll.
- Glue the face to the front of the toilet paper roll.
- Finally glue the legs to the sides of the toilet paper roll.
John The Baptist- Coloring Pages
 John The Baptist
(Coloring Pages)
Coloring pages are a great way to end a Sunday School lesson. They can serve as a great take home activity. Or sometimes you just need to fill in those last five minutes before the end of class.
Preview and print this free printable coloring page by clicking on the link below.
Feel free to browse all of our Bible print-outs.
All images used with permission of Patmos Editorial Company.
Jesus Baptism
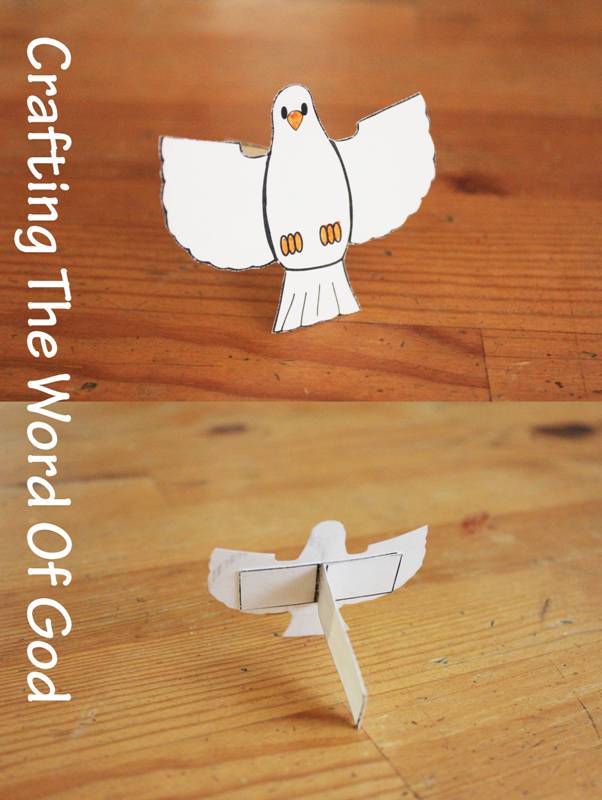
This quick craft will help illustrate the story of Jesus’ baptism.

Instructions
- Print the template on card stock. (Template)
- Color the main image and the dove.
- Cut out the dove and the attachment parts.
- Assemble the dove and handle: Glue the singular rectangular piece to the back of the dove. Then take the longer attachment piece and bend the solid lines creating creases. On the same longer attachment piece glue the two larger rectangles together. Finally glue the smaller rectangles to the rectangle on the back of the dove.
- Cut on the solid line on the main image.
- Stick the dove piece through the slit on the main image. The dove can now go up and down as if the holy spirit is descending on Christ.
Jesus Baptism- Coloring Page
 Jesus Baptism
(Coloring Page)
Coloring pages are a great way to end a Sunday School lesson. They can serve as a great take home activity. Or sometimes you just need to fill in those last five minutes before the end of class.
Preview and print this free printable coloring page by clicking on the link below.
Feel free to browse all of our Bible print-outs.
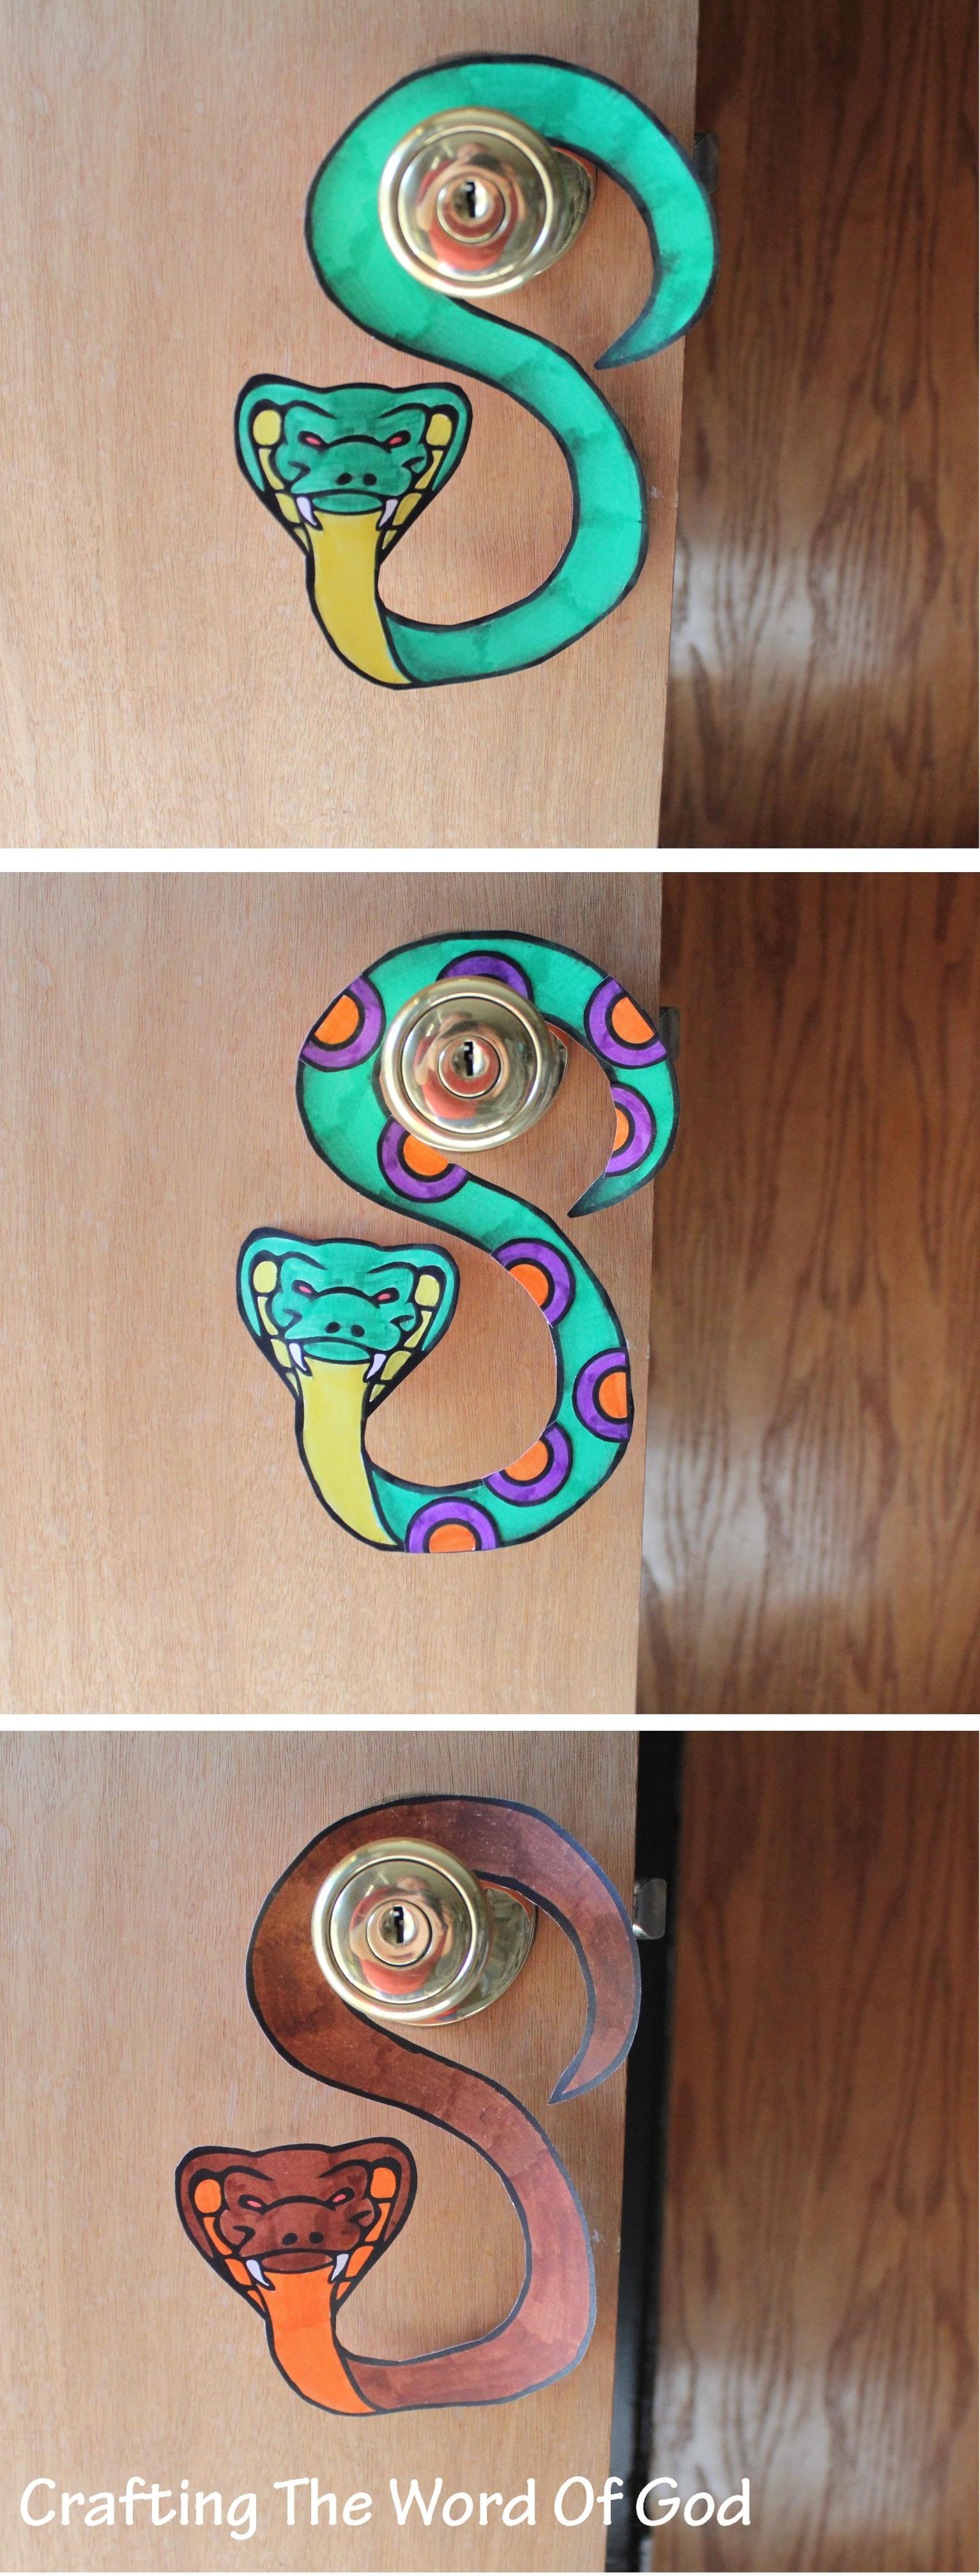
Snake Door Hanger
This craft is simple and versatile. It can be used for different Bible stories. It can be used for:
- The fall of man. (Genesis 3)
- When Paul was bitten by the viper. (Acts 28:3-5)
- Moses and the bronze snake. (Numbers 21:8-9)
- Aaron’s rod becomes a snake. (Exodus 7:8-13)
- God providing through prayer. (Luke 11:1-13)
- John The Baptist calling the Pharisees brood of vipers. (Matthew 3:7)
- Jesus calling the Pharisees snakes and vipers. (Matthew 23:33)
Instructions
- Print the template on card stock. (Template)
- Color and cut out all of the pieces.
- Glue on the half circles, if using.
- Turn the piece around and cut of any excess half circle.
If you use this craft for the story of the bronze snake, tape the finished craft on a wooden broom handle.
The Plague Of Locusts
Today’s crafts are based on the eighth plague on Egypt, the plague of locusts.
“13 So Moses stretched out his staff over the land of Egypt, and the Lord directed an east wind on the land all that day and all that night; and when it was morning, the east wind brought the locusts. 14 The locusts came up over all the land of Egypt and settled in all the territory of Egypt; they were very numerous. There had never been so many locusts, nor would there be so many again.15 For they covered the surface of the whole land, so that the land was darkened; and they ate every plant of the land and all the fruit of the trees that the hail had left. Thus nothing green was left on tree or plant of the field through all the land of Egypt.” Exodus 10:13-15
Clothespin Grasshopper

Instructions
- Color a wooden clothespin green using a permanent marker.
- Print the template onto cardstock. (Template)
- Color and cut out every piece.
- Glue each piece to s piece of green construction paper.
- Cut out each piece from the construction paper.
- Glue the wings to the the clothespin, then the covering over the wings.
- Take the bracket piece and fold it on the solid line making a crease.
- Glue the smaller square to the back of the grasshoppers face and the other end to the clothespin.
- Grab two green chenille stems/ pipe cleaners. One should be 5″ (the front legs) and the other should be 7″ (the back legs).
- With a hot glue gun, glue both pieces in place. (The shorter piece will go into the larger hole of the clothespin and the longer piece will go into the small hole of the clothespin).
Pop Up Grasshopper
This craft is a repeat, but I wanted to include it.

Instructions
- Print the template onto a sheet of cardstock. (Template)
- Cut out all of the pieces leaving a border of cardstock around each piece.
- Glue the pieces onto a sheet of black construction paper.
- Cut out all of the pieces.
- Glue each wing to the back of the grasshopper pieces.
- Take the rectangle piece and fold along both solid lines, making two creases.
- Add glue to one side of the rectangle piece and stick it on one of the grasshopper pieces, right between the thorax and the abdomen.
- Do the same thing with the other piece of grasshopper, making sure to line up both grasshopper pieces. The legs will now be able to hold up the entire grasshopper.
Grasshopper
Kids will love making this grasshopper craft. This craft is very versatile and can be used for different Bible stories. It can be used for teaching the story of:
- The twelve spies.
- The ten plagues of Egypt.
- John the Baptist.
Instructions
- Print the template onto a sheet of cardstock. (Template)
- Cut out all of the pieces leaving a border of cardstock around each piece.
- Glue the pieces onto a sheet of black construction paper.
- Cut out all of the pieces.
- Glue each wing to the back of the grasshopper pieces.
- Take the rectangle piece and fold along both solid lines, making two creases.
- Add glue to one side of the rectangle piece and stick it on one of the grasshopper pieces, right between the thorax and the abdomen.
- Do the same thing with the other piece of grasshopper, making sure to line up both grasshopper pieces. The legs will now be able to hold up the entire grasshopper.
White Dove

This craft can be done for different bible stories and adapted for each one. It is very versatile. It can be used for:
- Teaching children the story of Noah. (Genesis 6-9) You can add a branch to the birds mouth for this story.
- Teaching children when Jesus was baptized. (Matthew 3)
- Or you can teach about who the Holy Spirit is.
If you have any other ideas about what other bible stories this craft can be applied to I would love to read them in the comments section.
Instructions
- Print out the templates. (Template)
- Cut out the body, the wings and the feathers.
- Snip each individual feather around the border of the feather. (For a nice effect, before snipping the feathers, crumble them up, then snip each individual feather around the border).
- Then glue the feathers onto each wing. (Eight on the bottom and six on the top).
- Glue the wings to the body.
- Finally color in the beak. If the child chooses he can draw on the feet.

You must be logged in to post a comment.