David
David And Goliath- Coloring Pages

David And Goliath
(Coloring Page)
Coloring pages are a great way to end a Sunday School lesson. They can serve as a great take home activity. Or sometimes you just need to fill in those last five minutes before the end of class.
Preview and print this free printable coloring page by clicking on the link below.
Feel free to browse all of our Bible print-outs.
All images used with permission of Patmos Editorial Company.
Abigail Keeps The Peace
“18 Then Abigail hurried and took two hundred loaves of bread and two jugs of wine and five sheep already prepared and five measures of roasted grain and a hundred clusters of raisins and two hundred cakes of figs, and loaded them on donkeys. 19 She said to her young men, “Go on before me; behold, I am coming after you.” But she did not tell her husband Nabal.” 1 Samuel 25:18-19

Instructions
- Print the template on cardstock. (Template)
- Color and cut out both pieces.
- Glue the Abigail piece to a large popsicle stick.
- Cut along the thin slit on the Davids army piece. This is where the image of Abigail will pop through.
Solomons Temple- Coloring Page
 Solomons Temple
(Coloring Page)
Coloring pages are a great way to end a Sunday School lesson. They can serve as a great take home activity. Or sometimes you just need to fill in those last five minutes before the end of class.
Preview and print this free printable coloring page by clicking on the link below.
Feel free to browse all of our Bible print-outs.
Solomons Temple
A quick craft to go along with the story of Solomon building the temple in Jerusalem.
This craft can also be done for the story of the reconstruction of the temple.


Instructions
- Print the template on card stock. (Template)
- Color the template.
- Cut out the template.
- Assemble the temple by adding glue to the side tabs.
Your kids can use gold glitter glue to decorate the columns, doors and side panels.
Ark Of The Covenant
Have your kids make their very own ark of the covenant.


This craft can be used for telling the story of:
- Its creation, description and purpose.
- Crossing the river Jordan.
- The battle of Jericho.
- Having it stolen and returned by the Philistines.
- Its return to Jerusalem.
- God granting Solomon wisdom.
- The creation of Solomon’s temple.
Instructions
- Print the template on either yellow or white card stock. (Template)
- Color and cut out all of the pieces if you printed it on white card stock. If printed on yellow card stock you can skip the coloring it in part.
- Assemble the bottom, large box by folding on the solid lines and adding glue to the tabs.
- Once the large box is assembled, glue the long pieces to each side of the box.
- Next assemble the rectangular piece.
- Glue on the rectangular piece to the top of the large box.
- Finally glue on both angels.
Paper Plate Sheep
This cute and simple lamb craft will be a great add-on to any Bible lesson.


It can be used for:
- Cain and Abel’s offerings to God. (Genesis 4)
- Jesus as the Good Shepherd. (John 10:1-17)
- Jesus as The Lamb of God. (John 1:29-35)
- Jesus sacrificial death. (Isaiah 53)
- The shepherds visiting Christ on the night of His birth. (Luke 2:7-20)
- Israel’s practice of burnt offerings.
- The Passover. (Exodus 12)
- The story of David. (1 Samuel 17)
- False teachers as wolves in sheep’s clothing. (Matthew 7:15-20)
- The final judgement. (Matthew 25:32-33)
Instructions
- Print the template on card stock. (Template)
- Color and cut out the face and legs of the sheep.
- Optional: At this point you can cover the paper plate with either cotton balls or pop corn.
- Glue the head onto the paper plate.
- Finally glue the legs onto the paper plate. Make sure the back legs are slightly higher than the ones in front.
The Lord Is My Shepherd
This psalm is probably the best known passage of the Old Testament. It is a testimony by David to the God’s faithfulness throughout his life. This psalm serves as a reminder to our kids that God watches over us and takes care of us.
“1 The Lord is my shepherd, I shall not want. 2 He makes me lie down in green pastures; He leads me beside quiet waters. 3 He restores my soul; He guides me in the paths of righteousness for His name’s sake. 4 Even though I walk through the valley of the shadow of death, I fear no evil, for You are with me; Your rod and Your staff, they comfort me. 5 You prepare a table before me in the presence of my enemies; You have anointed my head with oil; My cup overflows. 6 Surely goodness and loving kindness will follow me all the days of my life, And I will dwell in the house of the Lord forever.” Psalm 23

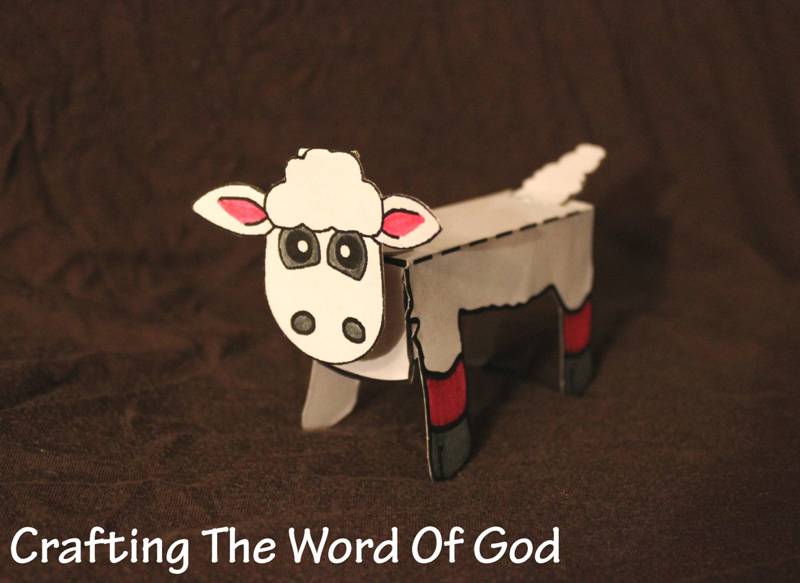
Instructions
- Print the template on card stock. (Template)
- Color and cut out all of the pieces.
- Assemble The Body: Fold on the solid and dashed lines. Glue the hinges to the sides of the legs. Slit both of the solid lines on the back of the sheep.
- Assemble The Head: Fold on the solid lines. Add glue to the underside of the middle square and fold the head back gluing it in place.
- Finally place the tail part of the head piece through the first slit of the back of the sheep and bring it up through the second slit.
This craft can also be used for other Bible stories.
- Cain and Abel’s offerings to God. (Genesis 4)
- Jesus as the Good Shepherd. (John 10:1-17)
- Jesus as The Lamb of God. (John 1:29-35)
- Jesus sacrificial death. (Isaiah 53)
- The shepherds visiting Christ on the night of His birth. (Luke 2:7-20)
- Israel’s practice of burnt offerings.
- The Passover. (Exodus 12)
- The story of David. (1 Samuel 17)
- False teachers as wolves in sheep’s clothing. (Matthew 7:15-20)
- The final judgement. (Matthew 25:32-33)
Davids Harp
David was a master musician, a poet, a writer of psalms, a worshiper and a man after God’s own heart. This cute craft will serve as a great reminder of the life of David. A lowly shepherd boy chosen by God to be the king of Israel.

Instructions
- Print the template onto cardstock. If you use regular paper glue the template onto a piece of construction paper for strength. (Template)
- Cut out the template from the cardstock or construction paper.
- Color in the template.
- Using masking tape, tape five or six pieces of thin yarn onto the template.
- Finally add glue and join both sides of the template together forming the harp.
Sheep Puppet

Kids will love making the sheep puppet and reenacting Bible stories. You can even use the puppet to teach your lesson. This craft is very versatile and can be used for different Bible stories. It can be used for:
- The story of Cain and Abel’s offerings to God. (Genesis 4)
- The description of Jesus as the Good Shepherd. (John 10:1-17)
- The Biblical description of Jesus as The Lamb of God. (John 1:29-35)
- Jesus sacrificial death. (Isaiah 53)
- Psalm 23
- The shepherds visiting Christ on the night of His birth. (Luke 2:7-20)
- Israel’s practice of burnt offerings.
- The Passover. (Exodus 12)
- The story of David. (1 Samuel 17)
- The description of false teachers and prophets as wolves in sheeps clothing. (Matthew 7:15-20)
- Teaching about the final judgement. (Matthew 25:32-33)
Instructions
- Print the template page onto a sheet of cardstock. (Template)
- Color the arms.
- Cut out each piece.
- Glue the arms to the body of the sheep.
- Assemble the head by first gluing on the ears and then the top wool.
- Glue the head onto the body of the sheep.
- Finally cut out the two ovals to make the finger holes.
You can also glue pieces of cotton balls to the body and head of the sheep.
Goliath BullsEye Target
David and Goliath is the story of a young boy named David who wins a battle against a giant named Goliath through the power and dependence on God. Goliath is very intimidating and none of the Israeli trained soldiers dare to challenge him. Yet with God’s help David is able to take him on armed only with a slingshot and stone, without even wearing any armor to protect him. This game helps illustrate this famous story and can help teach children to allow God to fight their battles for them and to have faith in the strength of God, even against great odds.

You can use a variety of items when you play this game to try and land them on the target. A few ideas: small/aquarium sized stones, gray clay dried out to resemble stones, small bean bags, crumpled pieces of gray construction paper. If you laminate the target you can flick dimes as if you were playing shuffleboard. And for your older kids, if you trust them enough :), you can enlarge it and pin it behind a cork board. They can then try to hit the target using darts.
Instructions
- Print the template on cardstock. (Template)
- Color and cut all three pieces.
- Glue the target onto the face piece.
- Finally glue the smallest piece on top of the target piece.
Optional: Laminate the target using self laminating sheets or contact paper.

You must be logged in to post a comment.