obedience
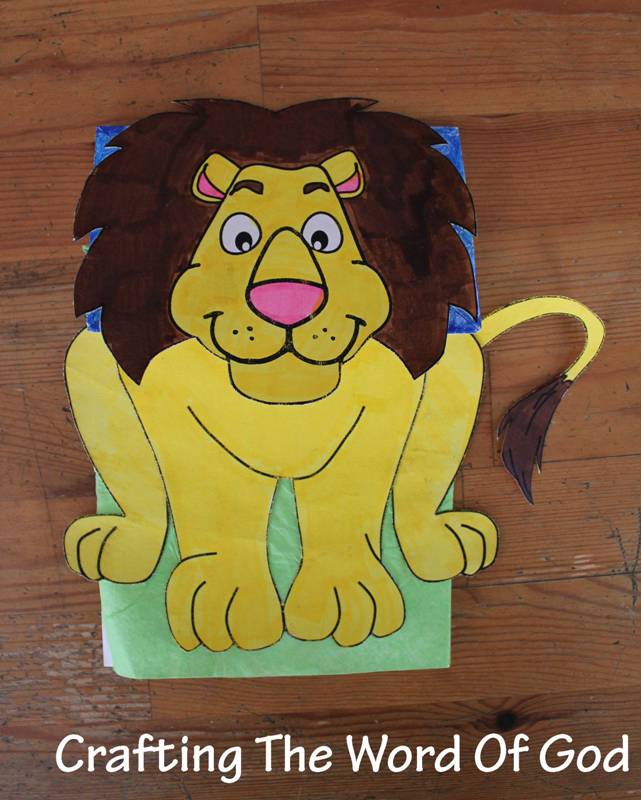
Daniel Lion Puppet
This Daniel and the lions den craft is quick and simple. Once your kids finish making it they have their very own lion puppet.

Instructions
- Print the template. (Template)
- Color and cut out all of the pieces.
- Glue the body parts to the body of the lion.
Optional: You can use paper fasteners/ split pins/ metal brads to attach the pieces to the lion body. This way your kids will be able to move the body parts on the lion puppet.
Daniel Prayed Puzzle- Activity Sheet
 Daniel Prayed Puzzle
(Activity Sheet)
Activity sheets are a great way to end a Sunday School lesson. They can serve as a great take home activity. Or sometimes you just need to fill in those last five minutes before the end of class.
Preview and print this free printable activity sheet by clicking on the link below.
Feel free to browse all of our Bible print-outs.
Instructions
Print the template on regular copy paper, but I recommend card stock.
Color then cut out each puzzle piece.
To make the pieces last longer you can laminate each individual piece.
Daniel Prayed- Coloring Page
 Daniel Prayed
(Coloring Page)
Coloring pages are a great way to end a Sunday School lesson. They can serve as a great take home activity. Or sometimes you just need to fill in those last five minutes before the end of class.
Preview and print this free printable coloring page by clicking on the link below.
Feel free to browse all of our Bible print-outs.
Daniel In The Lions Den Puppet 1
With this craft your kids will be able to make their very own lion for the story of Daniel in the lions den.
I also have a version were the lion appears to be talking. (Version 2)
Instructions
- Print the template. (Template)
- Turn a paper sandwich/lunch bag upside down. Paint the small square blue and the large square green. You can also use tissue paper or construction paper.
- Color and cut out all of the pieces from the template.
- Glue the head of the lion onto the blue square.
- Glue the smaller legs to the body of the lion.
- Glue the tail onto the body of the lion.
- Glue the body of the lion onto the green square.
- Optional: Cut off any extra green area from the bottom of the puppet.
Jonah Sun Catcher
Things are starting to calm down around here so I decided to upload a quick post.
This is another quick, but cute sun catcher craft. This time for one of my favorite stories; the story of Jonah and the great fish.

Instructions
- Print the template onto card stock. (Template)
- Glue the template sheet to the back of a sheet of black construction paper.
- Cut out all of the white from the template. You will be left with the fish border shape. Keep the eye and body figure.
- Place the fish shape onto a self laminating sheet or contact paper, construction paper side down.
- Then place the eye and figure inside the body of the fish.
- Fill the inside of the fish with tissue paper.
- Cover with another sheet of self laminating sheet or contact paper.
- Cut out the fish from the laminating sheet or contact paper.
- Stick the fish to your window with double sided tape.
Pauls Conversion Mask
This craft will help visualize the conversion of Paul for your kids.
Make sure you explain both sides of the mask when you tell your kids the story.

Instructions
- Print the template on card stock. (Template)
- Color both faces.
- Cut out both faces.
- Glue a large popsicle stick to the back of one of the faces.
- Glue the second head to the other side of the first one, the popsicle stick will be between both faces.
- Place a sheet of wax paper over the smiling face.
- Trace the outline of both eyes onto the wax paper.
- Cut out the eyes from the wax paper.
- Finally glue the wax paper eyes onto the eyes of the sad face.
Abraham Offers Isaac- Coloring Page
 Abraham Offers Isaac
(Coloring Page)
Coloring pages are a great way to end a Sunday School lesson. They can serve as a great take home activity. Or sometimes you just need to fill in those last five minutes before the end of class.
Preview and print this free printable coloring page by clicking on the link below.
Feel free to browse all of our Bible print-outs.
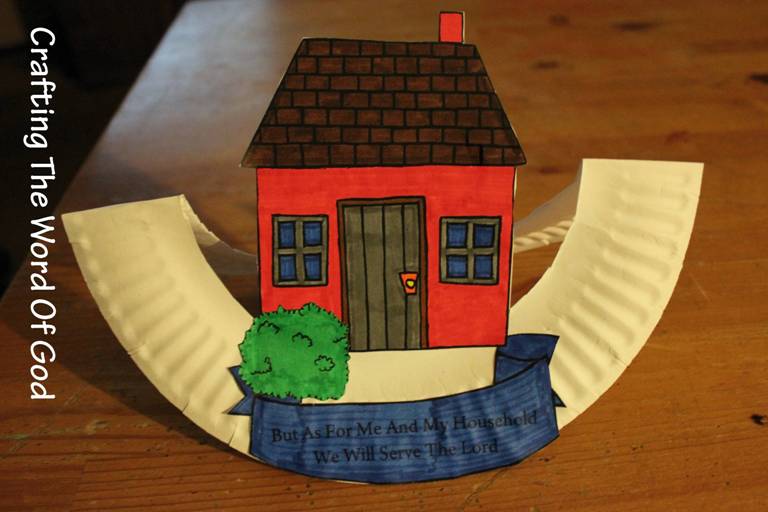
We Will Serve The Lord Two Ways
“As for me and my house, we will serve the LORD.” Joshua 24:15
This Bible verse has been memorized at some point in every children’s ministry. This is a great attitude to teach our kiddos and these crafts will be a constant reminder of this.
We Will Serve The Lord Door Hanger
This first craft is a simple hanging sign. After the children finish it they can place it on their bedroom door, on their bed post or even hang off the car rear view mirror.

Instructions
- Print the template on cardstock. (Template)
- Color and cut out all of the pieces..
- Glue the three large rectangular pieces together from biggest to smallest.
- Then glue on the Bible verse piece.
- Lastly cut out the space to be able to slip it onto the door knob.
If your kids like they can then add stickers, jewels, or draw on designs. Let them use their imagination.
We Will Serve The Lord Table Top
I found this version online and immediately fell in love with it. Sadly no template was available. So I decided to come up with my own. Place this finished craft on your mantle or table.
Instructions
- Print out the template. (Template)
- Color everything.
- At this point if you choose you can paint the paper plate.
- First glue the banner onto the paper plate.
- Then the house and finally the bush.
- Cut out the center circle of the plate cutting around the house.
- Then fold the plate in half to form the stand.

You must be logged in to post a comment.