animals
Christmas Nativity Scene
 We made these Christmas nativity scenes this week for our childrens programs.
Instructions
- Print the template onto heavy cardstock. (Template)
- Color and cut out all of the pieces.
- On the largest piece fold along the dashed lines all the way to the top. By doing this you are creating the sides.
- Fold the bottom of the largest piece and cut just on the dashed lines.
- Glue the bottom (hay) piece to the largest piece.
- Fold the bottom of each of the figure pieces.
- Glue the Jesus set to the middle of the scene.
- Finally glue the other figure on each side of the Jesus set.
Feel free to spruce up the crafts by using actual hay on the bottom of the scene or using glitter on the star and hay.
You can also leave the background of the scene white and place a flameless candle behind the assembled craft.
Noahs Ark Puzzle- Activity Sheet
 Noahs Ark Puzzle
(Activity Sheet)
Activity sheets are a great way to end a Sunday School lesson. They can serve as a great take home activity. Or sometimes you just need to fill in those last five minutes before the end of class.
Preview and print this free printable activity sheet by clicking on the link below.
Feel free to browse all of our Bible print-outs.
Noahs Ark Match Game
A great card game to help reinforce the story of Noah and the ark.

Instructions
- Print the template on card stock. You will need to print the second page twice. (Template)
- Color and cut out all of the pieces.
- Glue an ark piece to the back of every animal piece.
You can have the cards assembled for your kids and then all they have to do is color them in.
Noahs Ark- Coloring Page
 Noahs Ark
(Coloring Page)
Coloring pages are a great way to end a Sunday School lesson. They can serve as a great take home activity. Or sometimes you just need to fill in those last five minutes before the end of class.
Preview and print this free printable coloring page by clicking on the link below.
Feel free to browse all of our Bible print-outs.
Noah And The Ark
This craft will be a cute way for your kids to act out the story of Noah and the ark for themselves.


Instructions
- Print the template on card stock. (Template)
- Color and cut out all of the pieces.
- Glue the ocean piece onto the edge of a paper plate. The finished ocean piece will have a straight back and a curved front.
- With the other two pieces (the boat pieces) fold on the solid lines and the dashed lines, creating creases.
- Assemble the bottom part by adding glue onto the parts marked “glue”.
- Assemble the top part by adding glue onto the parts marked “glue”.
- Finish the ark by gluing the top part to the bottom part.
Noahs Ark Animal Match- Activity Sheet
 Noahs Ark Animal Match
(Activity Sheet)
Activity sheet are a great way to end a Sunday School lesson. They can serve as a great take home activity. Or sometimes you just need to fill in those last five minutes before the end of class.
Preview and print this free printable activity sheet by clicking on the link below.
Feel free to browse all of our Bible print-outs.
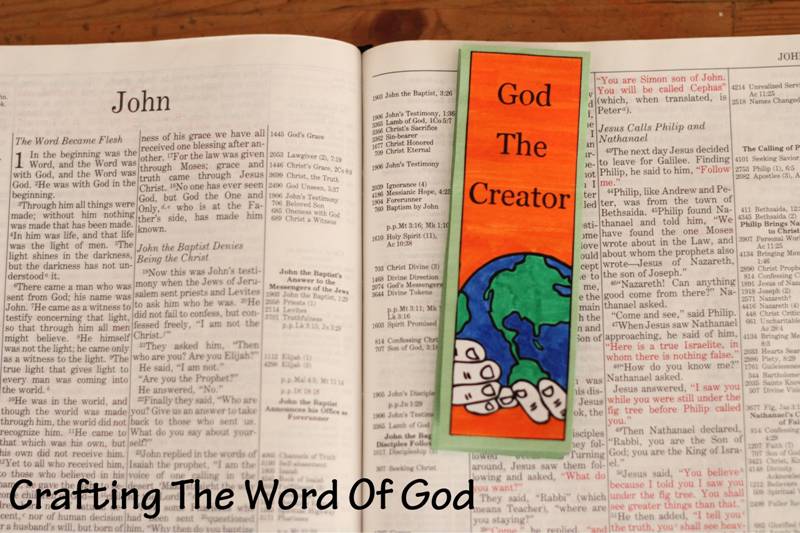
In The Beginning Bookmark
“In the beginning, God created the heavens and the earth.” Genesis 1:1
This cute bookmark will serve as a constant reminder that God is the creator and sustainer of everything.

Instructions
- Print the templates. (Template)
- Color and cut out all of the pieces.
- Grab the blank rectangle and trace it twice onto construction paper.
- Cut out the rectangles.
- Glue the “in the beginning” template onto one of the construction paper cut outs.
- Glue the cloud and z’s to the back of the large template. In between the 5 middle spaces.
- After the cloud and z’s have dried, on the other side, fold on the solid lines creating a crease. Do this for all of the solid lines. The rectangle will fold in on itself into one visible rectangle.
- Add glue to the back of the 1st day square and stick it on the back of the “in the beginning” piece.
- Finally add glue on the empty rectangle, right after the sixth day, and stick it onto the last construction paper piece.
Your kids can now go over the story of creation at any time and will have a wonderful tool to share the story with their friends.
Noahs Ark Doorknob Hanger
One of my favorite Bible stories to make crafts for is the story of Noah’s ark, There are dozens and dozens of ideas you can play off of. The rainbow, the ark, the dove, Noah himself.
Here’s a cute craft your kids will enjoy making. It will remind them of this biblical story every time they see it.

Instructions
- Print the template onto cardstock. You can use regular copy paper just be careful not to rip the craft. You can glue each piece onto construction paper for strength. (Template)
- Color and cut out all of the pieces.
- Add glue to the rectangle on the rainbow. Center the ark making sure the top of the rectangle aligns with the top of the ark.
- Glue on the wave, then the long strip.
- Finally glue on the animals.
You can adapt this craft any way you choose.
- Add glitter to the rainbow.
- Leave the wave off and color the long strip brown.
- You can use stickers or foam animals.
- Add on this cute Noah figure. (Template)
Days Of Creation Wheel
The Days Of Creation Wheel is a good way to share the story of God creating the world. Each wedge tells the story of what God did on that day of creation. This would make a great take home reminder of the lesson.

Instructions
- Print the templates on cardstock. (Template)
- Color and cut them out.
- Make a small hole into the middle of the circles and stick a metal brad through it. Open and bend the legs.
Days Of Creation
This craft project about the days of creation would be a great add-on to any Sunday School lesson. You can always use the craft to re-tell the Bible story after the kiddos are done making it.

This craft will require some prep work.
Instructions
- Print out the templates. (Template)
- Cut out each image and trace it onto the colored construction paper of your choice.
- Cut them out and glue them onto the designated number.
- Cut off any overhang of construction paper from the numbers.
- Glue the numbers onto cardstock.
- Cut out the numbers leaving a small white border around the number.

You must be logged in to post a comment.