crafts
Crossing The Red Sea
A great craft to help your kids remember the walls of the Red Sea and how God performed a miracle that allowed His people to cross into safety.
“Then Moses stretched out his hand over the sea; and the Lord swept the sea back by a strong east wind all night and turned the sea into dry land, so the waters were divided.” Exodus 14:21

Instructions
- Print and color the templates. (Template)
- Cut out the figures and the main background.
- Fold the creases on the main background.
- Add glue to the two tabs to form the background.
- Fold the crease on the base of the figures.
- Add glue to the base of the figures and place them on the main background.
In the picture I colored the sand yellow, but your kids can use actual sand to decorate the background.
Cloud Dough
This dough has a great consistency. It goes from powdery one moment to moldable wet sand the next. Plus it smells wonderful. Your kids will have hours of fun!
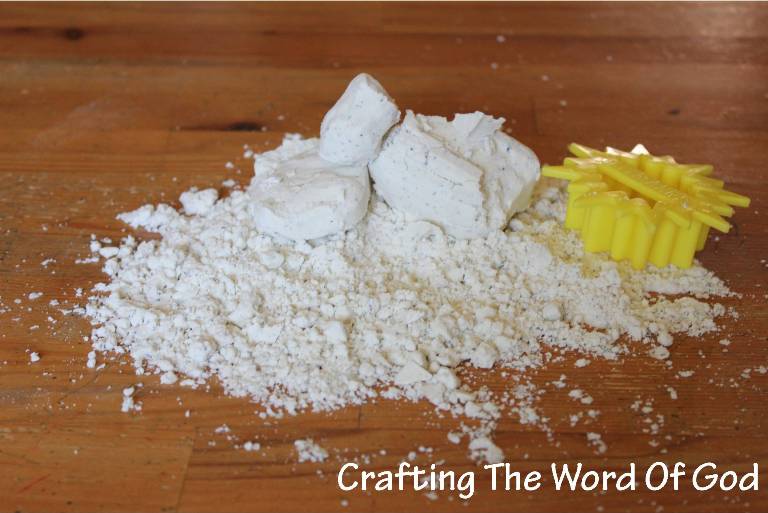
Ingredients
- 8 cups flour
- 1 cup baby oil
Instructions
- Combine all the ingredients in a large bowl.
- Place the dough into a large tray.
- Lay the tray on a table or other flat surface (I recommend using this dough outside since it can get all over the place). Put small containers and plastic toys in the tray with the dough. You and your kiddos will have tons of fun!


Cross Number Game
 This is a quick but fun game to play with your kiddos.
Print out the sheet and give one to each of your kids. (Template) In order to play this game you will also need a single dice. You can be creative and use a jumbo foam dice.
Each child will take a turn rolling the dice. Whatever number the dice lands on, the child that rolled the dice has to color in that number on their sheet (just one number not all three of the same number).
If they land on a number that all three spots have been colored in the next player will take his turn.
The winner of the game is the child that can color in all of their cross first.
 Everyone has a couple of wild dice throwers in their family or class. Every time they throw the dice it seams to land all over the place, except the board. I found this trick on Pinterest a little while ago. Just take any small container (I am using an empty Gerber baby food container), and place your dice inside.
This way no matter how hard they roll the dice, the dice stay in place. This trick is great to use with board games that include many small pieces like Monopoly and Risk. How many of us have not had a friend or family member roll the dice and accidentally scatter all the little houses around. Use this trick and save yourself the headache. 🙂
The Lords Supper
A cute way to remember the sacrifice of Christ on the cross and the significance of the Lords Supper.
“For I received from the Lord that which I also delivered to you, that the Lord Jesus in the night in which He was betrayed took bread; and when He had given thanks, He broke it and said, “This is My body, which is for you; do this in remembrance of Me.” In the same way He took the cup also after supper, saying, “This cup is the new covenant in My blood; do this, as often as you drink it, in remembrance of Me.” For as often as you eat this bread and drink the cup, you proclaim the Lord’s death until He comes.” 1 Corinthians 11:23-26

Instructions
- Print the templates onto cardstock. (Template)
- Color the templates.
- Cut out the templates.
- Take the table template and fold along the dotted lines. Add glue to the side tabs and form the table.
- Next glue the disciples on the bench to one side of the table.
- On the other side of the table glue on the group with two disciples to the right of the table.
- Then glue on the Jesus group to the left of the two disciples you previously glued on.
- Finally glue on the last disciple holding the bowl of soup.
Sandals Of Peace
“…and having shod your feet with the preparation of the gospel of peace.” Ephesians 6:15

Instructions
- Trace a your kiddos shoes onto cardboard. Cut it out using large scissors or a utility knife. This step should be done by an adult. Poster board will work as well and will be easier to cut.
- Next glue a sheet of black, gray or brown foam onto the bottom of each cut out. Cut of any excess foam so that you are left with the original cardboard shape.
- Then do the same thing on the other side with a sheet of construction paper.
- Have the child place his foot on the sandal base. Take a 1 yard ribbon (1 to 1 1/2 in. wide) and place one end under the cutout, wrap over the child’s foot, and tuck it back under the sandal. Cut of the extra ribbon. Do this for both cut outs. (You will need two 1 yard ribbons).
- Next add glue to the ends of the ribbons you just measured. Place it over the child’s foot again and tuck the ends under the cut out. Have the child slowly remove his foot to allow the ribbon to dry. If you would like extra support glue the ribbon first onto a piece of paper or cardstock. Then glue it onto the sandal base. (This is for the front of the foot.)
- Glue the ribbon that is left to the cut out. Lay the ribbon in front of you. Find the center. Glue on to the cut out, on the spot right between the end of the foot’s arch and the beginning of the heel. Do this for both cut outs.
- After the sandals have dried have the child place his feet in them. Then wrap the ribbon in front of the leg and then back around the leg making a criss-cross pattern. (As shown in the picture below.)
- After criss-crossing 3 times, tie the ribbon in the back to hold it up. Cut of any excess ribbon.

I have included the words SANDALS and PEACE. (Template)
If your kiddos choose they can glue one of the words to each sandal.
Belt Of Truth
“Stand firm therefore, having girded your loins with truth…” Ephesians 6:14
When I was coming up with a craft for the Belt Of Truth I did a quick Google search. I wanted to get an idea about how roman soldier belts actually looked like and came upon this picture.

I really liked it and that is what I based my craft on. This is what I ended up with.
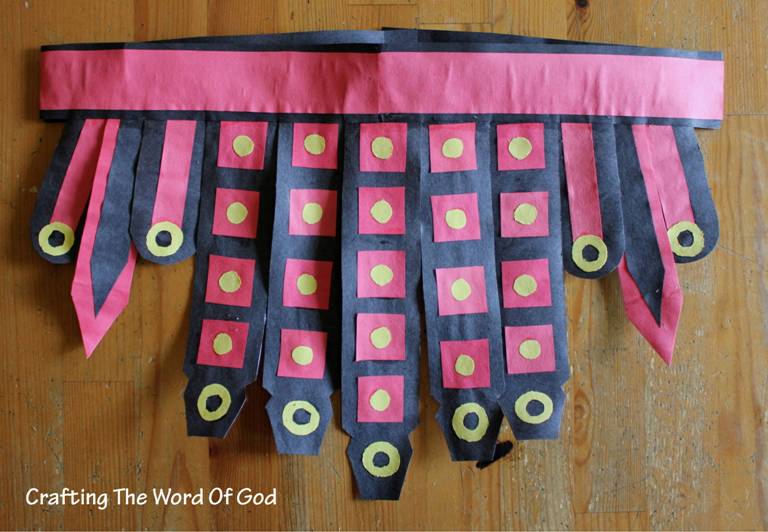
There are quite a few parts to this craft, but I have included detailed instructions. Don’t worry because once you actually print the template, by just looking at the picture you can easily figure it out.
Instructions
- Print out the templates onto colored cardstock. (Each page is labeled either red, black or yellow.) (Template)
- This craft has a lot of individual parts, but I have labeled them for easy assembly. After you print out the templates cut them up in groups. (Ex: In page 4 cut out the two smaller pieces and the letter D together.)
- Group your cut outs together. (A with A’s, D with D’s. This makes assembly incredibly quick.)
- Finish trimming the individual pieces from the cardstock. Keep them organized.
- Start by gluing and assembling groups A, E, F. (Group A will become the part that holds everything together.)
- Next glue a small yellow circle to the middle of a red square. (You will need 21 of each.)
- Glue the red square/ yellow circle pieces onto the long strips B, C, D. (B will need 5 squares and C/D will need 4 squares each piece.)
- To finish assembling the strips glue the yellow rings onto pieces B, C, D, F.
- Lay strip A in front of you. Add glue to the top of strip B, find the center of strip A and add strip B to the bottom back. Do the same with strips C, D, E and F.
- To finish the belt, wrap the belt around the child’s waist. Cut off any excess, leaving about 2 inches. (Basically one side of strip A should be 2 inches longer then the other side.)
- To hold up the belt you can either use stick on Velcro or 3 large paper clips.
I have included the word “Truth” in case your kiddo wishes to place it on the belt.
For the yellow rings you can use plastic or metal washers spray painted yellow. For the small yellow circles you can use plastic bingo chips spray painted yellow. Colored foam sheets can also be used for the smaller pieces including the red squares.
Breastplate Of Righteousness
“…and having put on the breastplate of righteousness.” Ephesians 6:14

Instructions
- Print the templates. (Template) The pages marked A are for an older child. The ones marked B are for a younger child.
- Cut out the templates.
- To assemble the breastplate glue together the template pieces.
- For extra strength glue the assembled breastplate onto one side of a grocery paper bag. Cut it out of the paper bag.
- Cut out the half oval template and trace it onto 2 or 3 different colors of construction paper.
- Cut them out and glue them onto the assembled breastplate, starting from the bottom.
- Cut out the neck strap pieces and then glue each piece onto a sheet of cardstock for strength.
- Assemble the neck strap, cutting each piece to the desired length. (As shown in the picture at the bottom.)
- Add Velcro to the beck strap and onto the breastplate to hold it in place. This makes it removable. You can also use yarn and a one hole punch if you choose not to use the neck strap.
I have included the word “Righteousness” in case your kiddo wishes to place it along the chest area of the breastplate.

Shield Of Faith
“…in addition to all, taking up the shield of faith with which you will be able to extinguish all the flaming arrows of the evil one.” Ephesians 6:16

Instructions
- Print and cut out the templates. (Template)
- Trace the big template, the shield shape, onto a piece of white cardstock and onto a piece of either brown, grey, or black construction paper.
- Cut both traced images out and glue them together. One side will be white, this will be the back, and the other will have color. This will be the front.
- Cut up the smaller shield template into four individual parts. Trace two parts on one color of construction paper and the other two parts a different color.
- Glue them onto the colored side of the shield. Not the white side.
- Glue either the blank cross or the one with the word “FAITH” onto the shield. If your kiddos choose they can fill in the word “FAITH” with glitter glue, the same color they used to color in the word.
- Color the small holder. Fold twice where the diagonal lines meet the empty space.
- Add glue to the back of the diagonal lines. Glue it vertically to the back of the shield
Just as with the Sword Of The Spirit, you can also fashion a shield out of cardboard or poster board.
Sword Of The Spirit
“…and the sword of the Spirit, which is the word of God.” Ephesians 6:17


One side has the words “Sword Of The Spirit”. The other has a list of the Books of the Bible.
Instructions
- Print the template on card stock. (Template) I have included blank templates for both sides in case you prefer a blank sword.
- Color and cut out both sides of the sword.
- If you do not have card stock, glue each piece of the sword to either poster board, construction paper or onto an empty cereal box.
- After the glue dries cut both sides out.
- Glue strips of brown construction paper onto the grip in different spacings and angles. Then cut off any overhang.
- Glue both pieces of the sword together.
- Finally add glitter glue to the center of the pommel or you could glue on a large oval jewel.

You must be logged in to post a comment.