God
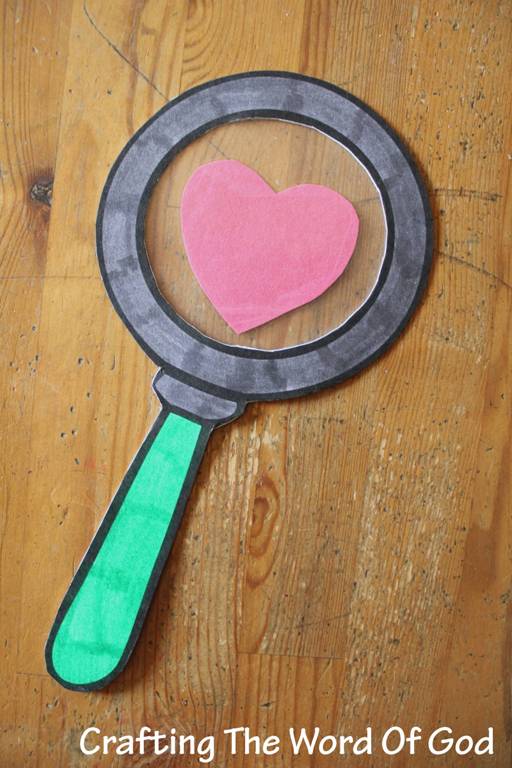
God Searches Our Hearts
Our kids are growing up in a world that is obsessed with outwardly appearances. They are made to feel like they won’t fit in if they don’t have the same clothes as all of their friends. Even adults are bombarded with commercials telling them they need this or that to make themselves more attractive and happier.
But what does God look at? What does He care about?
God looks at our hearts. “God sees not as man sees, for man looks at the outward appearance, but the Lord looks at the heart.” 1 Samuel 16:7
Since God looks at our hearts, shouldn’t we be more concerned with our souls than our bodies? This is what we want our kids to learn. “Look deep into my heart, God, and find out everything I am thinking. Don’t let me follow evil ways, but lead me in the way that time has proven true.” Psalm 139:23-24
Instructions
- Print the templates. (Template)
- Color and cut out the magnifying glasses.
- Glue the magnifying glass pieces to cardstock for strength.
- Cut out the magnifying glass from the cardstock.
- Cut out the heart and circle template.
- Glue the handles of the magnifying glasses together. Not the rim around the “glass.”
- Trace the heart onto a sheet of red construction paper and cut it out.
- Trace the circle twice onto contact paper.
- Cut out the circles.
- Take the back off of one of the circles and in the center of the circle place the heart.
- Remove the back of the other circle and place it on top of the heart/circle. This makes the “glass” of the magnifying glass.
- Place the “glass” in between the rims of the magnifying glass templates, centering it.
- Add glue to the templates to hold the “glass” in place.
Samson’s Strength
This craft will bring out the creativity in your kids. Kids love reading the story of strong Samson and this craft will help them remember your lesson. Be creative with the materials you use.

Instructions
- Print and color the template. (Template)
- Depending on the material you use: String– Cut and glue different lengths of string to the top of Samson’s head. You can even mix and match colors. Cooked Spaghetti– When you cook the spaghetti, cook it in batches and add food coloring to the water. Playdough– Use homemade or store bought playdough.
If you laminate the page after you color it, you will get many uses out of this activity.
Elisha Helps A Widow Match Game
A fun game to play to help accompany the story of Elisha helping the widow.

Instructions
- Print the templates. Each child will only need twelve cards (six pairs). They can pick and choose between the different jars. (Template)
- Color all the jars including the ones with the words. (The cards with the words should be colored the same color).
- Cut out all of the cards.
- Glue the the six pairs of cards onto construction paper.
- Cut out the six pairs of cards from the construction paper.
- Finally glue the twelve cards with the words to the back of the construction paper cards.
If you laminate the cards they will last for a long time. You can use self laminating sheets or contact paper.
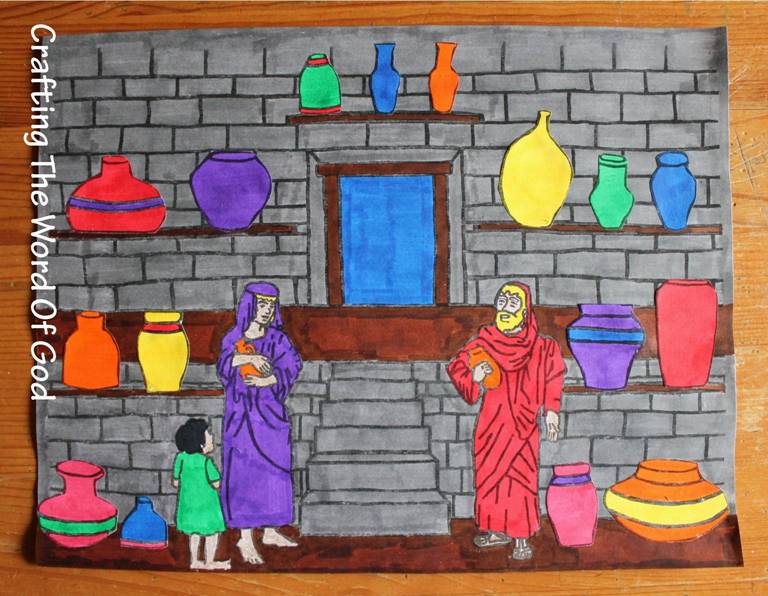
Elisha And The Jar Of Oil
This craft will be a great reminder that God provides for our needs.
Instructions
- Print the templates. (Template)
- Color the main image and the jars.
- After the jars are colored in cut them out.
- Glue the jars onto the main image.
Days Of Creation Wheel
The Days Of Creation Wheel is a good way to share the story of God creating the world. Each wedge tells the story of what God did on that day of creation. This would make a great take home reminder of the lesson.

Instructions
- Print the templates on cardstock. (Template)
- Color and cut them out.
- Make a small hole into the middle of the circles and stick a metal brad through it. Open and bend the legs.
Crossing The Red Sea
A great craft to help your kids remember the walls of the Red Sea and how God performed a miracle that allowed His people to cross into safety.
“Then Moses stretched out his hand over the sea; and the Lord swept the sea back by a strong east wind all night and turned the sea into dry land, so the waters were divided.” Exodus 14:21

Instructions
- Print and color the templates. (Template)
- Cut out the figures and the main background.
- Fold the creases on the main background.
- Add glue to the two tabs to form the background.
- Fold the crease on the base of the figures.
- Add glue to the base of the figures and place them on the main background.
In the picture I colored the sand yellow, but your kids can use actual sand to decorate the background.
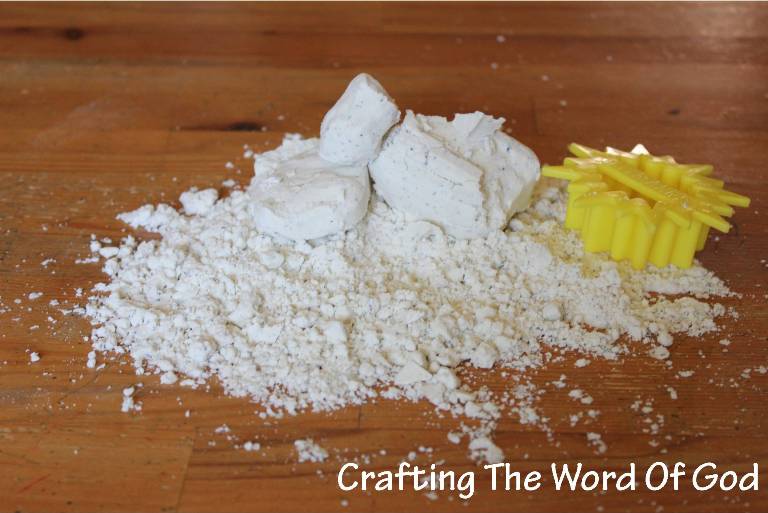
Cloud Dough
This dough has a great consistency. It goes from powdery one moment to moldable wet sand the next. Plus it smells wonderful. Your kids will have hours of fun!
Ingredients
- 8 cups flour
- 1 cup baby oil
Instructions
- Combine all the ingredients in a large bowl.
- Place the dough into a large tray.
- Lay the tray on a table or other flat surface (I recommend using this dough outside since it can get all over the place). Put small containers and plastic toys in the tray with the dough. You and your kiddos will have tons of fun!
Sandals Of Peace
“…and having shod your feet with the preparation of the gospel of peace.” Ephesians 6:15

Instructions
- Trace a your kiddos shoes onto cardboard. Cut it out using large scissors or a utility knife. This step should be done by an adult. Poster board will work as well and will be easier to cut.
- Next glue a sheet of black, gray or brown foam onto the bottom of each cut out. Cut of any excess foam so that you are left with the original cardboard shape.
- Then do the same thing on the other side with a sheet of construction paper.
- Have the child place his foot on the sandal base. Take a 1 yard ribbon (1 to 1 1/2 in. wide) and place one end under the cutout, wrap over the child’s foot, and tuck it back under the sandal. Cut of the extra ribbon. Do this for both cut outs. (You will need two 1 yard ribbons).
- Next add glue to the ends of the ribbons you just measured. Place it over the child’s foot again and tuck the ends under the cut out. Have the child slowly remove his foot to allow the ribbon to dry. If you would like extra support glue the ribbon first onto a piece of paper or cardstock. Then glue it onto the sandal base. (This is for the front of the foot.)
- Glue the ribbon that is left to the cut out. Lay the ribbon in front of you. Find the center. Glue on to the cut out, on the spot right between the end of the foot’s arch and the beginning of the heel. Do this for both cut outs.
- After the sandals have dried have the child place his feet in them. Then wrap the ribbon in front of the leg and then back around the leg making a criss-cross pattern. (As shown in the picture below.)
- After criss-crossing 3 times, tie the ribbon in the back to hold it up. Cut of any excess ribbon.

I have included the words SANDALS and PEACE. (Template)
If your kiddos choose they can glue one of the words to each sandal.
Belt Of Truth
“Stand firm therefore, having girded your loins with truth…” Ephesians 6:14
When I was coming up with a craft for the Belt Of Truth I did a quick Google search. I wanted to get an idea about how roman soldier belts actually looked like and came upon this picture.

I really liked it and that is what I based my craft on. This is what I ended up with.
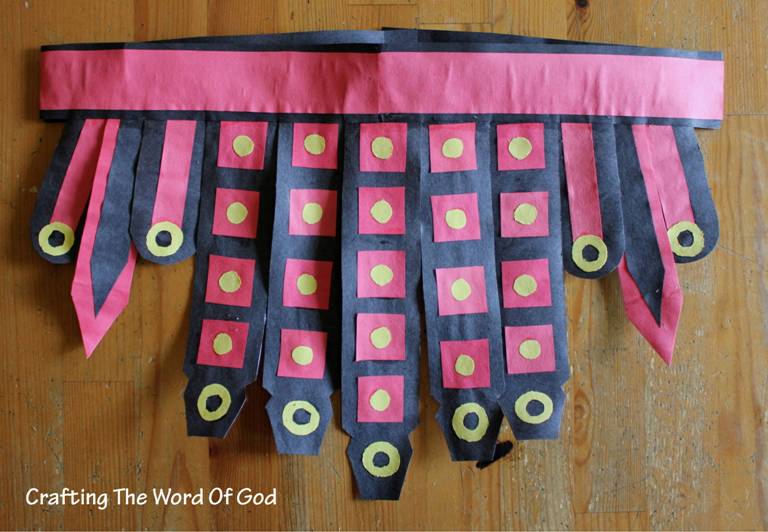
There are quite a few parts to this craft, but I have included detailed instructions. Don’t worry because once you actually print the template, by just looking at the picture you can easily figure it out.
Instructions
- Print out the templates onto colored cardstock. (Each page is labeled either red, black or yellow.) (Template)
- This craft has a lot of individual parts, but I have labeled them for easy assembly. After you print out the templates cut them up in groups. (Ex: In page 4 cut out the two smaller pieces and the letter D together.)
- Group your cut outs together. (A with A’s, D with D’s. This makes assembly incredibly quick.)
- Finish trimming the individual pieces from the cardstock. Keep them organized.
- Start by gluing and assembling groups A, E, F. (Group A will become the part that holds everything together.)
- Next glue a small yellow circle to the middle of a red square. (You will need 21 of each.)
- Glue the red square/ yellow circle pieces onto the long strips B, C, D. (B will need 5 squares and C/D will need 4 squares each piece.)
- To finish assembling the strips glue the yellow rings onto pieces B, C, D, F.
- Lay strip A in front of you. Add glue to the top of strip B, find the center of strip A and add strip B to the bottom back. Do the same with strips C, D, E and F.
- To finish the belt, wrap the belt around the child’s waist. Cut off any excess, leaving about 2 inches. (Basically one side of strip A should be 2 inches longer then the other side.)
- To hold up the belt you can either use stick on Velcro or 3 large paper clips.
I have included the word “Truth” in case your kiddo wishes to place it on the belt.
For the yellow rings you can use plastic or metal washers spray painted yellow. For the small yellow circles you can use plastic bingo chips spray painted yellow. Colored foam sheets can also be used for the smaller pieces including the red squares.
Breastplate Of Righteousness
“…and having put on the breastplate of righteousness.” Ephesians 6:14

Instructions
- Print the templates. (Template) The pages marked A are for an older child. The ones marked B are for a younger child.
- Cut out the templates.
- To assemble the breastplate glue together the template pieces.
- For extra strength glue the assembled breastplate onto one side of a grocery paper bag. Cut it out of the paper bag.
- Cut out the half oval template and trace it onto 2 or 3 different colors of construction paper.
- Cut them out and glue them onto the assembled breastplate, starting from the bottom.
- Cut out the neck strap pieces and then glue each piece onto a sheet of cardstock for strength.
- Assemble the neck strap, cutting each piece to the desired length. (As shown in the picture at the bottom.)
- Add Velcro to the beck strap and onto the breastplate to hold it in place. This makes it removable. You can also use yarn and a one hole punch if you choose not to use the neck strap.
I have included the word “Righteousness” in case your kiddo wishes to place it along the chest area of the breastplate.


You must be logged in to post a comment.