Bible Crafts
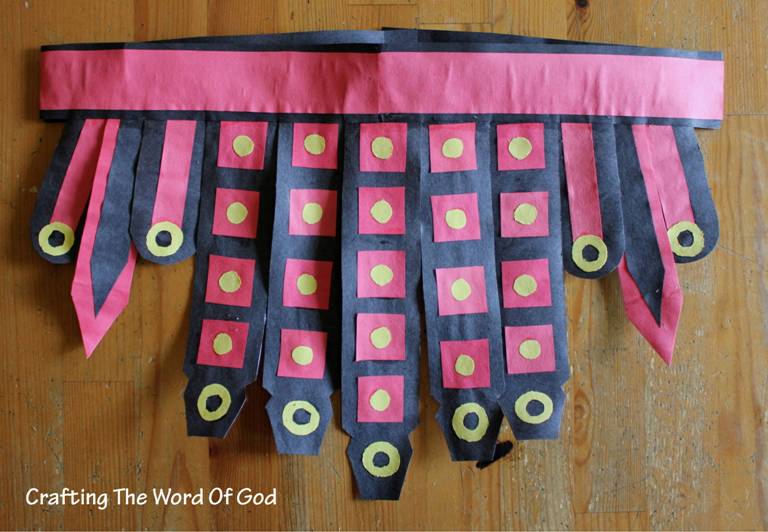
Breastplate Of Righteousness
“…and having put on the breastplate of righteousness.” Ephesians 6:14

Instructions
- Print the templates. (Template) The pages marked A are for an older child. The ones marked B are for a younger child.
- Cut out the templates.
- To assemble the breastplate glue together the template pieces.
- For extra strength glue the assembled breastplate onto one side of a grocery paper bag. Cut it out of the paper bag.
- Cut out the half oval template and trace it onto 2 or 3 different colors of construction paper.
- Cut them out and glue them onto the assembled breastplate, starting from the bottom.
- Cut out the neck strap pieces and then glue each piece onto a sheet of cardstock for strength.
- Assemble the neck strap, cutting each piece to the desired length. (As shown in the picture at the bottom.)
- Add Velcro to the beck strap and onto the breastplate to hold it in place. This makes it removable. You can also use yarn and a one hole punch if you choose not to use the neck strap.
I have included the word “Righteousness” in case your kiddo wishes to place it along the chest area of the breastplate.

Shield Of Faith
“…in addition to all, taking up the shield of faith with which you will be able to extinguish all the flaming arrows of the evil one.” Ephesians 6:16

Instructions
- Print and cut out the templates. (Template)
- Trace the big template, the shield shape, onto a piece of white cardstock and onto a piece of either brown, grey, or black construction paper.
- Cut both traced images out and glue them together. One side will be white, this will be the back, and the other will have color. This will be the front.
- Cut up the smaller shield template into four individual parts. Trace two parts on one color of construction paper and the other two parts a different color.
- Glue them onto the colored side of the shield. Not the white side.
- Glue either the blank cross or the one with the word “FAITH” onto the shield. If your kiddos choose they can fill in the word “FAITH” with glitter glue, the same color they used to color in the word.
- Color the small holder. Fold twice where the diagonal lines meet the empty space.
- Add glue to the back of the diagonal lines. Glue it vertically to the back of the shield
Just as with the Sword Of The Spirit, you can also fashion a shield out of cardboard or poster board.
Sword Of The Spirit
“…and the sword of the Spirit, which is the word of God.” Ephesians 6:17


One side has the words “Sword Of The Spirit”. The other has a list of the Books of the Bible.
Instructions
- Print the template on card stock. (Template) I have included blank templates for both sides in case you prefer a blank sword.
- Color and cut out both sides of the sword.
- If you do not have card stock, glue each piece of the sword to either poster board, construction paper or onto an empty cereal box.
- After the glue dries cut both sides out.
- Glue strips of brown construction paper onto the grip in different spacings and angles. Then cut off any overhang.
- Glue both pieces of the sword together.
- Finally add glitter glue to the center of the pommel or you could glue on a large oval jewel.
Helmet Of Salvation
“And take the helmet of salvation…” Ephesians 6:17

Instructions
- Print out the templates onto a piece of heavy duty card stock. For a smaller child print out the parts labeled “B”. (Template)
- Color and cut out the templates.
- Glue on the straps that will wrap around the head onto the main part of the helmet.
- Next fold the tip of the side pieces. Glue them onto the main part of the helmet. Right next to were you glued on the straps.
- Glue the nose piece onto the main part of the helmet. Do this by adding a small amount of glue at first to the back of the nosepiece. Have the child place the main part of the helmet on his face (in the position it will go), then center the nose piece and stick it onto the helmet. Add more glue if necessary.
- Finally to hold the straps together you could either use Velcro, or you can use paper clips to hold it in place then add glue.
I have included the word SALVATION in case you want to add it onto the helmet.
Armor Of God
The armor of God described in the book of Ephesians is a popular theme for Sunday School lessons and Vacation Bible Schools. Kids not only like making the armor, but they enjoy putting it on and playing around with it.
This past week I decided to come up with my own version of the armor of God. For the next six days I will be posting crafts on the complete armor of God. Each day will bring a different part of the armor. I’m sure your kiddos will love them.

“10 Finally, be strong in the Lord and in the strength of His might. 11 Put on the full armor of God, so that you will be able to stand firm against the schemes of the devil.” Ephesians 6:10-11

If you happen to have a Sunday School or Vacation Bible School armor of God theme and you wish to send me pics of your kiddos making or wearing the armor, I’d be glad to put them on my blog.
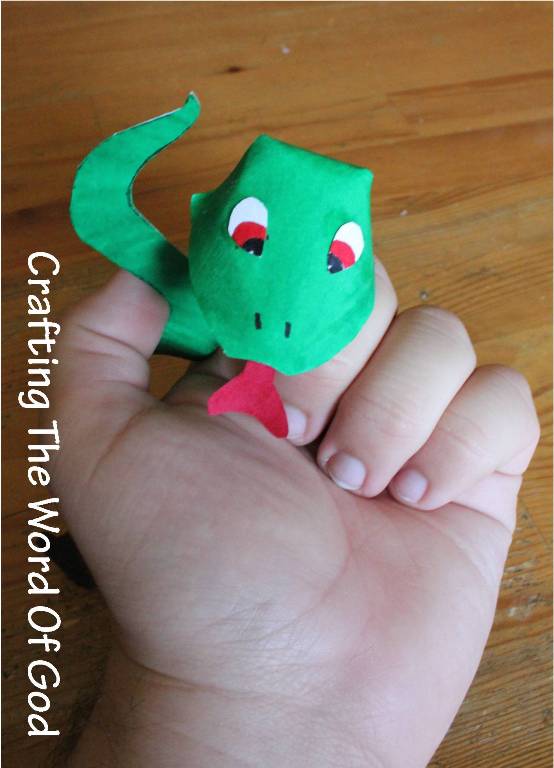
Fall Of Man
Use this craft to tell the story of the fall of man. This will present a great opportunity for you to share the Gospel with your kiddos.
Instructions
- Print the template onto a piece of cardstock. (Template)
- Color the snake.
- Form the head by adding glue on the dash lines.
- Next glue on the eyes and then the tongue.
- Glue the side tabs together to form a ring. Make sure your finger can fit through the rings.
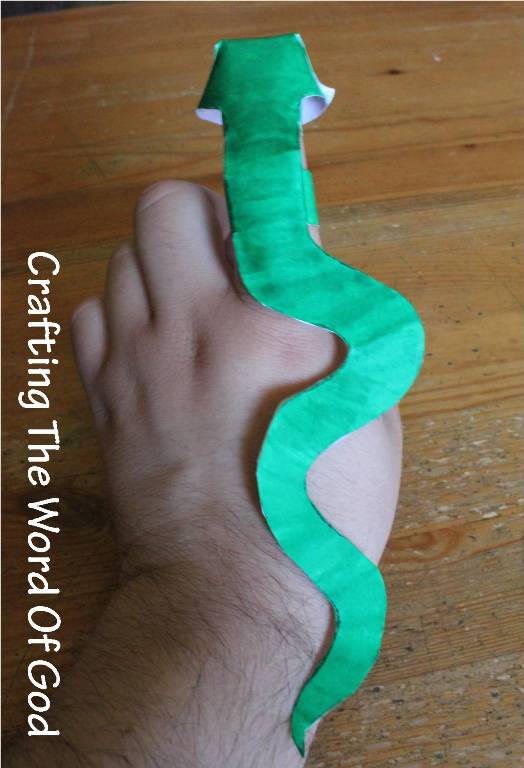
Aaron’s Rod Becomes a Snake
God appeared to Moses in a burning bush and told Moses He was sending him to Pharaoh to bring Gods people out of Egypt. Moses had many objections to God’s plan. He was fearful of Pharaoh rather than trusting in God. Four times he expressed his fear to God. When Moses expressed his lack of faith a fifth time, God became angry. Although God was angry with Moses, He had compassion on Moses. He understood Moses weakness and told Moses that He would send Aaron with him.
“The Lord said, “Moses, when the king asks you and Aaron to perform a miracle, command Aaron to throw his walking stick down in front of the king, and it will turn into a snake.” Exodus 7:8-9

Instructions
- Print out the template. (Template)
- Cut out all of the pieces.
- Trace them onto construction paper. For the rod use brown. For the snake your kiddos can be creative.
- Assemble the snake and cut of any overhang of construction paper so you are left with a perfect snake shape.
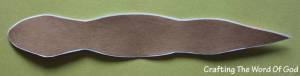
- Glue the rod onto a piece of cardstock.
- Cut it out leaving a small white border.
- Then glue on the snake.
The kiddos can also draw on wood designs onto the rod if they choose.
Seek Ye First
Worrying about our needs is not trusting God. We want our kiddos to not worry about their needs, but rather trust God to take care of them.
Make sure you clarify to the kiddos what those needs are. You find them in the context of the passage. “…as to what you will eat or what you will drink; nor for your body, as to what you will put on.” Matthew 6:25 We don’t want our kids going home thinking God promises to get them a new Xbox 🙂
“But seek first His kingdom and His righteousness, and all these things will be added to you. “ Matthew 6:33

Instructions
- Paint a paper plate blue.
- Print out the templates. (Template)
- Trace the templates onto construction paper.
- Glue on the nest to the paper plate.
- Then decorate the nest with strips of construction paper, hay, craft feathers, small leaves, or string.
- Next glue on the eggs. As many as you choose.
- Assemble the bird and then glue it on the nest.
- Finally glue on the branch to the paper plate.
If the kiddos choose to they can add paper flowers, leaves, or even tissue paper onto the tree branch.
Miraculous Catch Of Fish
Peter and his friends were experienced fishermen; they knew what they were doing. They had fished all night without catching a single fish. So when Jesus told him to row to a deeper part of the lake and lower his net it took a lot of trust from Peter. The trust and faith he had for Jesus led him to obey and this is what we want our kiddos to learn. Trusting in the word of God leads to obedience.
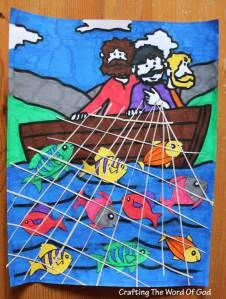
Instructions
- Print out the disciples in the boat page. (Template)
- Color the main image.
- Color and cut out the fish templates.
- Glue the fish onto the main image. Use as many fish as you like.
- Cut a sheet of white, brown or gray construction paper into thin strips. The thickness depends on the age of the children that will be making the craft. Younger kids will need thicker strips and older kids can use really thin ones.
- Glue the strips onto the main page, one at a time, in a crisscross pattern to make the net.
Jesus Rides A Donkey Into Jerusalem
This donkey craft helps the kiddos remember the Easter story of Jesus triumphantly entering into Jerusalem, with crowds waiving palm branches and crying out “Hosanna”.

Instructions
- Print out and color the donkey templates. (Template)
- Cut out the donkey and glue both sides together.
- Paint/color two clothespins gray.
- Then paint the bottom of the clothes pins black for the hooves.
- Using small pieces of black string, glue them onto the mane and the tail of the donkey. Cut off any excess string.
- Add the clothes pins to the finished body of the donkey.
This craft can also be made for the story of Balaam’s donkey.

You must be logged in to post a comment.