Bible Crafts
Days Of Creation Wheel
The Days Of Creation Wheel is a good way to share the story of God creating the world. Each wedge tells the story of what God did on that day of creation. This would make a great take home reminder of the lesson.

Instructions
- Print the templates on cardstock. (Template)
- Color and cut them out.
- Make a small hole into the middle of the circles and stick a metal brad through it. Open and bend the legs.
Jungle Jaunt Bible Crafts
I have been hard at work and as equally excited because in the coming weeks we will be working on preparing our church’s Vacation Bible School for this summer. Every year we choose from one of two themes provided by Life Way. This year we decided to go with their jungle theme version Jungle Jaunt.
![]()
So I have been busy as a beaver working and planning the crafts that will go along with our Bible story each day. Starting on Monday and continuing each day until Friday I will be posting our crafts for the entire week of Vacation Bible School. Each day crafts for a different Bible story.
I have noticed that many churches have already held their Vacation Bible School in June, but for those that still have not I hope these crafts will inspire you and help make planning your Vacation Bible School a little less stressful :).
Day 1 One Amazing Creator


Day Two One Miraculous Provider
Elisha Helps A Widow Match Game

Day 3 One Powerful Healer


Day 4 One Living Savior

Day 5 One Lord Of All

Blind Man Healed Mask
This craft will help your kiddos remember the story of Jesus healing a blind man. On one side of the mask you have a sad face with bandages on his eyes. This side symbolizes the blind man before he was healed. And on the other side you have a happy face with a big smile who has now been healed by the miraculous power of Christ.

Instructions
- Print and color the templates. (Template)
- Cut out both faces and the bandages. Each child will need two bandages.
- Glue each face onto a piece of construction paper. Both pieces of construction paper should be the same color.
- Cut out the faces again, leaving a small border of construction paper.
- Grab the happy face and place it facing down. Glue on a large popsicle stick for a handle.
- While this is drying glue on the bandages to the eyes of the sad face.
- Finally glue the sad face to the back of the happy face. The popsicle stick will be sandwiched in between both faces.
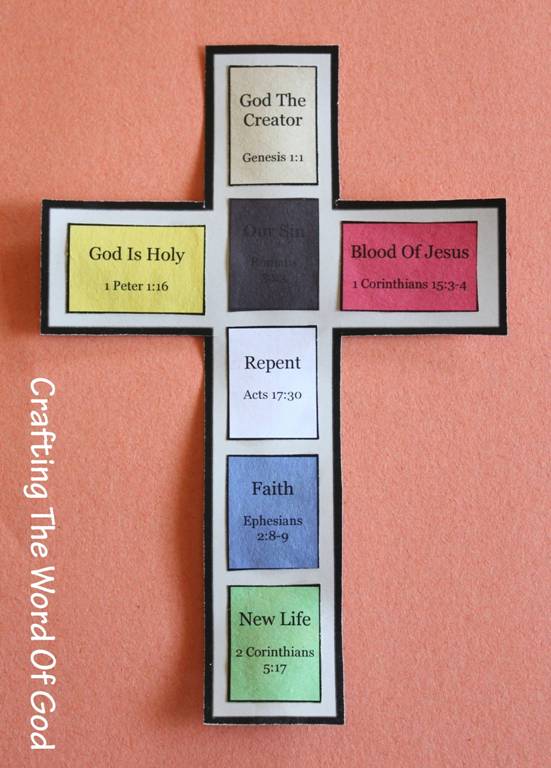
Gospel Cross
This craft makes use of colors to help children understand the gospel message. The color association makes it easy for children to remember each part of the gospel.
Brown– God As The Creator
Yellow– God Is Holy
Black– Our Sin, Total Depravity, Fallen Nature
Red– Blood Of Jesus, His Perfect Sacrifice, Substitutionary Death
White– Repentance
Blue– Faith
Green– New Life, New Creation
Instructions
- Print out, onto a page of light gray cardstock, the cross template. (Template)
- Cut it out.
- Print pages three to nine onto colored construction paper or cardstock. (Each page is labeled according to color.) Or if you choose you can print out the pages on white paper and your kids can color them in by hand.
- Using paper clips place each square on the cross in place. (The paper clips will hold each square in place so you are left with the correct spacing.)
- Glue each square in its place, one at a time.
Crossing The Red Sea
A great craft to help your kids remember the walls of the Red Sea and how God performed a miracle that allowed His people to cross into safety.
“Then Moses stretched out his hand over the sea; and the Lord swept the sea back by a strong east wind all night and turned the sea into dry land, so the waters were divided.” Exodus 14:21

Instructions
- Print and color the templates. (Template)
- Cut out the figures and the main background.
- Fold the creases on the main background.
- Add glue to the two tabs to form the background.
- Fold the crease on the base of the figures.
- Add glue to the base of the figures and place them on the main background.
In the picture I colored the sand yellow, but your kids can use actual sand to decorate the background.
Cloud Dough
This dough has a great consistency. It goes from powdery one moment to moldable wet sand the next. Plus it smells wonderful. Your kids will have hours of fun!
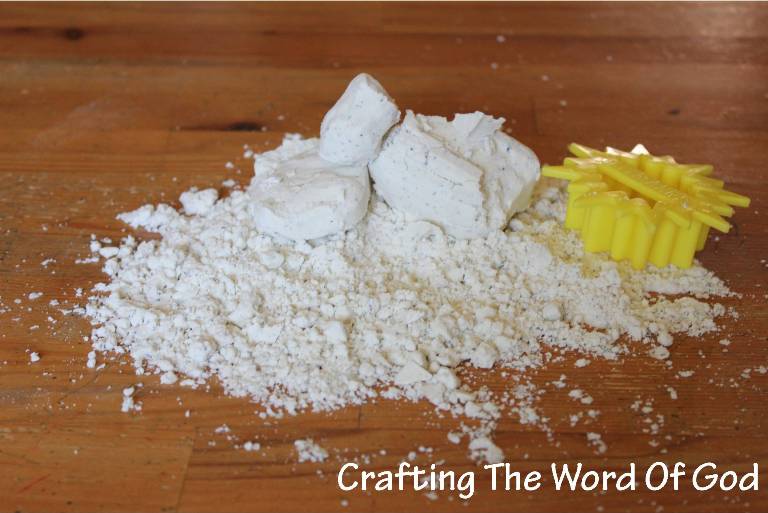
Ingredients
- 8 cups flour
- 1 cup baby oil
Instructions
- Combine all the ingredients in a large bowl.
- Place the dough into a large tray.
- Lay the tray on a table or other flat surface (I recommend using this dough outside since it can get all over the place). Put small containers and plastic toys in the tray with the dough. You and your kiddos will have tons of fun!
Cross Number Game
 This is a quick but fun game to play with your kiddos.
Print out the sheet and give one to each of your kids. (Template) In order to play this game you will also need a single dice. You can be creative and use a jumbo foam dice.
Each child will take a turn rolling the dice. Whatever number the dice lands on, the child that rolled the dice has to color in that number on their sheet (just one number not all three of the same number).
If they land on a number that all three spots have been colored in the next player will take his turn.
The winner of the game is the child that can color in all of their cross first.
 Everyone has a couple of wild dice throwers in their family or class. Every time they throw the dice it seams to land all over the place, except the board. I found this trick on Pinterest a little while ago. Just take any small container (I am using an empty Gerber baby food container), and place your dice inside.
This way no matter how hard they roll the dice, the dice stay in place. This trick is great to use with board games that include many small pieces like Monopoly and Risk. How many of us have not had a friend or family member roll the dice and accidentally scatter all the little houses around. Use this trick and save yourself the headache. 🙂
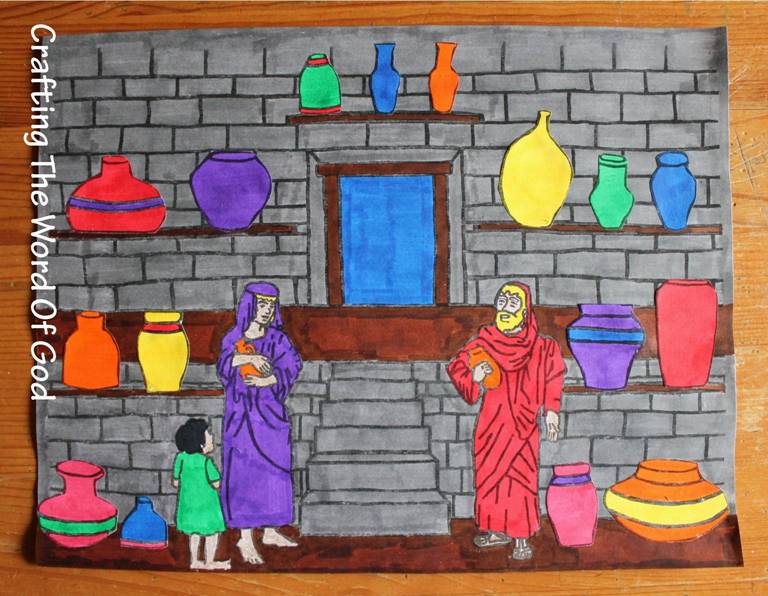
The Lords Supper
A cute way to remember the sacrifice of Christ on the cross and the significance of the Lords Supper.
“For I received from the Lord that which I also delivered to you, that the Lord Jesus in the night in which He was betrayed took bread; and when He had given thanks, He broke it and said, “This is My body, which is for you; do this in remembrance of Me.” In the same way He took the cup also after supper, saying, “This cup is the new covenant in My blood; do this, as often as you drink it, in remembrance of Me.” For as often as you eat this bread and drink the cup, you proclaim the Lord’s death until He comes.” 1 Corinthians 11:23-26

Instructions
- Print the templates onto cardstock. (Template)
- Color the templates.
- Cut out the templates.
- Take the table template and fold along the dotted lines. Add glue to the side tabs and form the table.
- Next glue the disciples on the bench to one side of the table.
- On the other side of the table glue on the group with two disciples to the right of the table.
- Then glue on the Jesus group to the left of the two disciples you previously glued on.
- Finally glue on the last disciple holding the bowl of soup.
Sandals Of Peace
“…and having shod your feet with the preparation of the gospel of peace.” Ephesians 6:15

Instructions
- Trace a your kiddos shoes onto cardboard. Cut it out using large scissors or a utility knife. This step should be done by an adult. Poster board will work as well and will be easier to cut.
- Next glue a sheet of black, gray or brown foam onto the bottom of each cut out. Cut of any excess foam so that you are left with the original cardboard shape.
- Then do the same thing on the other side with a sheet of construction paper.
- Have the child place his foot on the sandal base. Take a 1 yard ribbon (1 to 1 1/2 in. wide) and place one end under the cutout, wrap over the child’s foot, and tuck it back under the sandal. Cut of the extra ribbon. Do this for both cut outs. (You will need two 1 yard ribbons).
- Next add glue to the ends of the ribbons you just measured. Place it over the child’s foot again and tuck the ends under the cut out. Have the child slowly remove his foot to allow the ribbon to dry. If you would like extra support glue the ribbon first onto a piece of paper or cardstock. Then glue it onto the sandal base. (This is for the front of the foot.)
- Glue the ribbon that is left to the cut out. Lay the ribbon in front of you. Find the center. Glue on to the cut out, on the spot right between the end of the foot’s arch and the beginning of the heel. Do this for both cut outs.
- After the sandals have dried have the child place his feet in them. Then wrap the ribbon in front of the leg and then back around the leg making a criss-cross pattern. (As shown in the picture below.)
- After criss-crossing 3 times, tie the ribbon in the back to hold it up. Cut of any excess ribbon.

I have included the words SANDALS and PEACE. (Template)
If your kiddos choose they can glue one of the words to each sandal.
Belt Of Truth
“Stand firm therefore, having girded your loins with truth…” Ephesians 6:14
When I was coming up with a craft for the Belt Of Truth I did a quick Google search. I wanted to get an idea about how roman soldier belts actually looked like and came upon this picture.

I really liked it and that is what I based my craft on. This is what I ended up with.
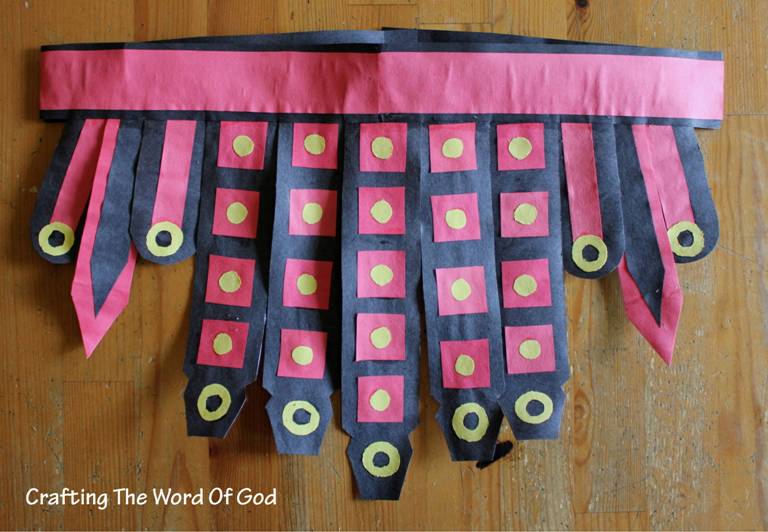
There are quite a few parts to this craft, but I have included detailed instructions. Don’t worry because once you actually print the template, by just looking at the picture you can easily figure it out.
Instructions
- Print out the templates onto colored cardstock. (Each page is labeled either red, black or yellow.) (Template)
- This craft has a lot of individual parts, but I have labeled them for easy assembly. After you print out the templates cut them up in groups. (Ex: In page 4 cut out the two smaller pieces and the letter D together.)
- Group your cut outs together. (A with A’s, D with D’s. This makes assembly incredibly quick.)
- Finish trimming the individual pieces from the cardstock. Keep them organized.
- Start by gluing and assembling groups A, E, F. (Group A will become the part that holds everything together.)
- Next glue a small yellow circle to the middle of a red square. (You will need 21 of each.)
- Glue the red square/ yellow circle pieces onto the long strips B, C, D. (B will need 5 squares and C/D will need 4 squares each piece.)
- To finish assembling the strips glue the yellow rings onto pieces B, C, D, F.
- Lay strip A in front of you. Add glue to the top of strip B, find the center of strip A and add strip B to the bottom back. Do the same with strips C, D, E and F.
- To finish the belt, wrap the belt around the child’s waist. Cut off any excess, leaving about 2 inches. (Basically one side of strip A should be 2 inches longer then the other side.)
- To hold up the belt you can either use stick on Velcro or 3 large paper clips.
I have included the word “Truth” in case your kiddo wishes to place it on the belt.
For the yellow rings you can use plastic or metal washers spray painted yellow. For the small yellow circles you can use plastic bingo chips spray painted yellow. Colored foam sheets can also be used for the smaller pieces including the red squares.

You must be logged in to post a comment.